
Let’s Blend Challenge
Hi everyone, it’s Joanne (jcaruth910) with this month’s Let’s Blend Challenge. Katie’s Painted Window Frame Layers are a great way to highlight a big photo and there are so many ways to work with them.
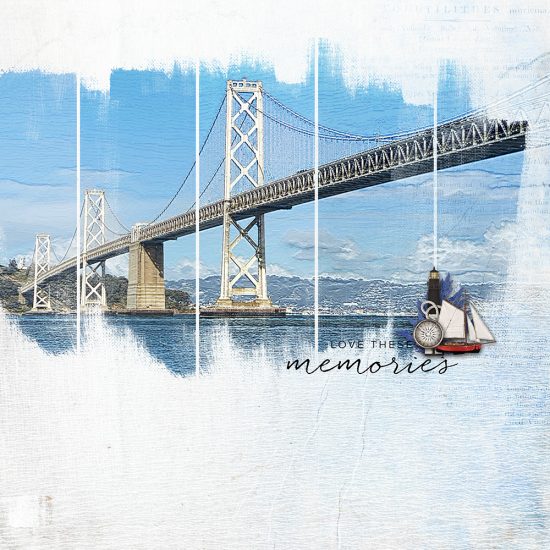
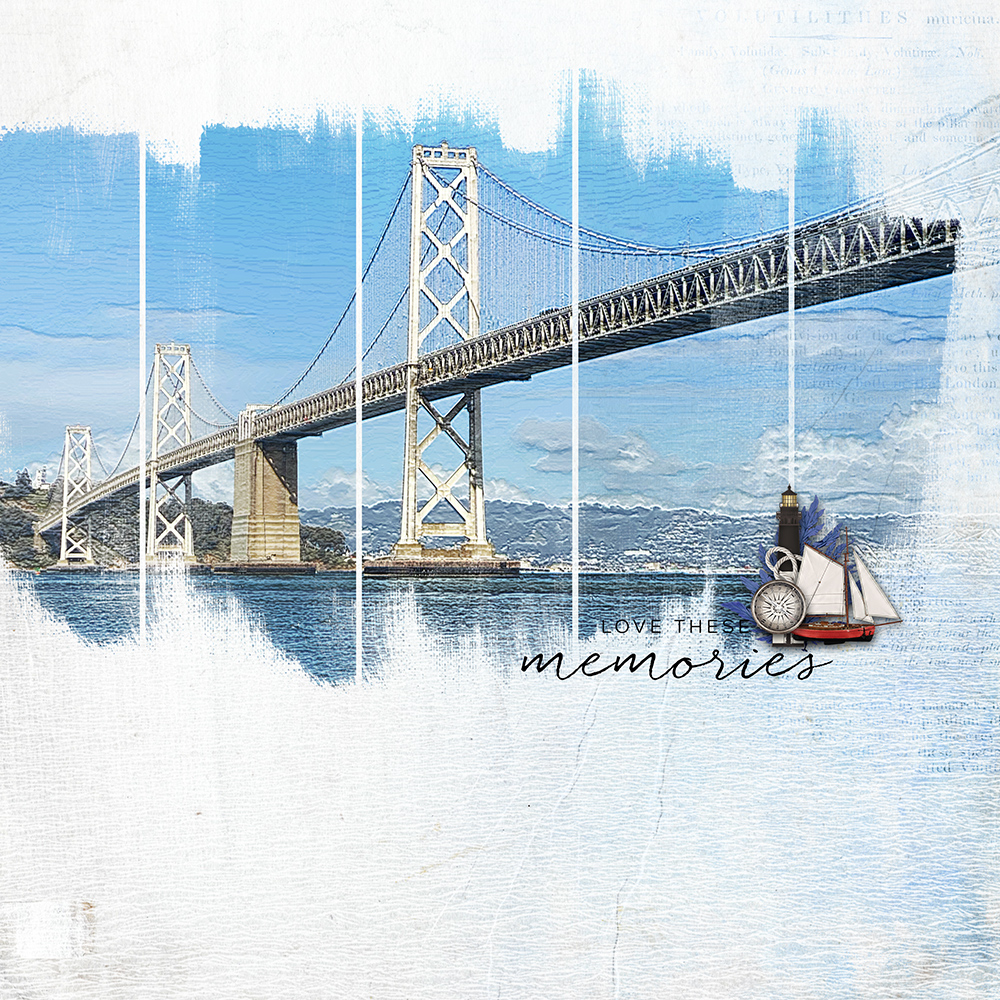
I was in the Bay Area of CA a couple of weeks ago and took this photo of the San Francisco Bay Bridge. The Painted Window Frame layers are a great way to showcase how the bridge spans the Bay. Because each “window frame” is a separate layer, there are endless ways to use this mask. Here, I clipped the photo to each layer and it looked great just like that. But because I love texture so much, I decided to use the Bas Relief filter (once again) on each layer and changed it to the overlay blend mode at 100% to make it pop. Each Bas Relief Layer is clipped to the photo, except for the bottom layer. (Remember, if you want to use the Bas Relief Layer, you have to duplicate the layer you want to use it on and the run the filter.) By NOT clipping it to that bottom photo, it extended the bridge out to the right and the water all the way down the page while creating kind of a sketch look. I changed the opacity of just this Bas Relief Layer ONLY to 75%. An embellishment and word art and that’s it!
Remember, you can change the opacity and the blend mode to create the amount of texture desired. Just play around with it.
Products: Painted Sealife Paper pack, Painted Window Frame Layers No. 3-1, Simple Scripts No. 1, Vintage Seas Layered Clusters
Katie has once again provided a Painted Window Frame layer and a background paper as a freebie. Don’t forget to share your page in the Let’s Blend Challenge thread and also update the March Challenges Participation Thread if you would like to earn store rewards.
I’ll be looking for your pages in the Gallery!
Joanne

Follow Us