
Get Inspired Challenge – Date Tags
Hello everyone,
Sharon here, in the middle of the wettest Winter we have seen in a long while in Western Australia! Personally, I’m a big fan of rain and don’t mind being a bit on the cold side either; so I’m happy! Except that today is my first day back at school after a three week break – for which I know I should be very grateful 🙂 I hope wherever you are, that the weather is treating you well (I can’t believe how hot some of you have been!!), or that you at least have a nice place to retreat to for a little scrapping!
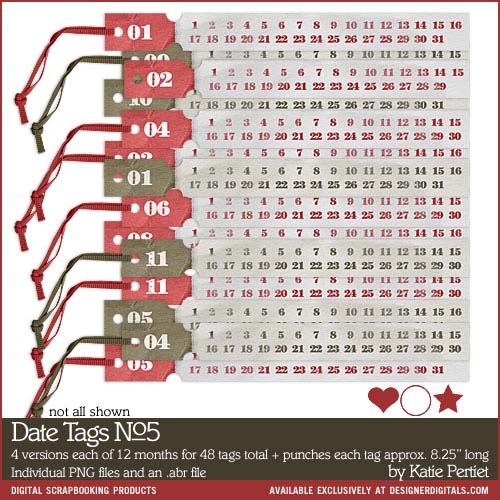
Today, I’m hoping to inspire you to use https://www.katiepertietdesigns.com/store/index.php/product/date-tags-05/ on a layout. Katie released this interesting element back in 2011. The pack includes two colours for each month along with a choice of plain or ribboned versions. This makes them a versatile element if you are choosing to use them in ways other than just to date your layout – although of course, they’re perfect for that too! And there are a couple of cute ‘punches’ to highlight the date of your layout.
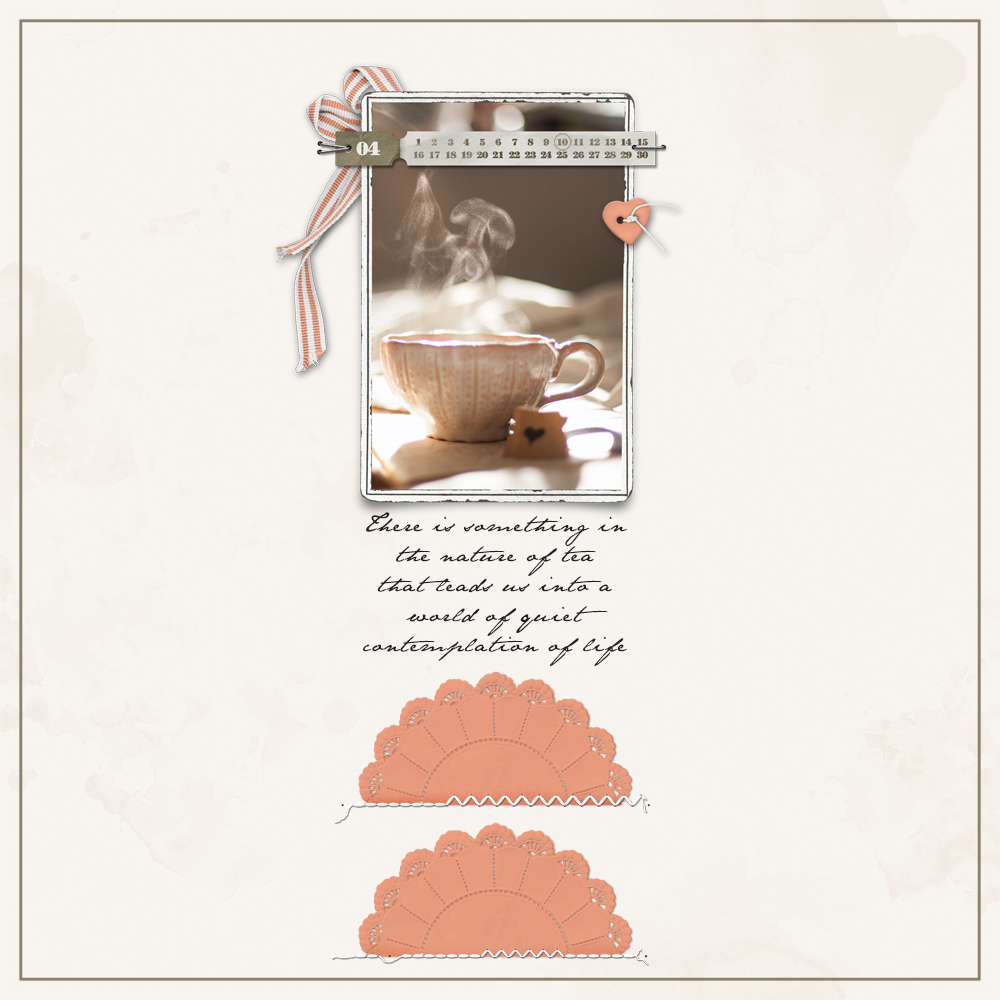
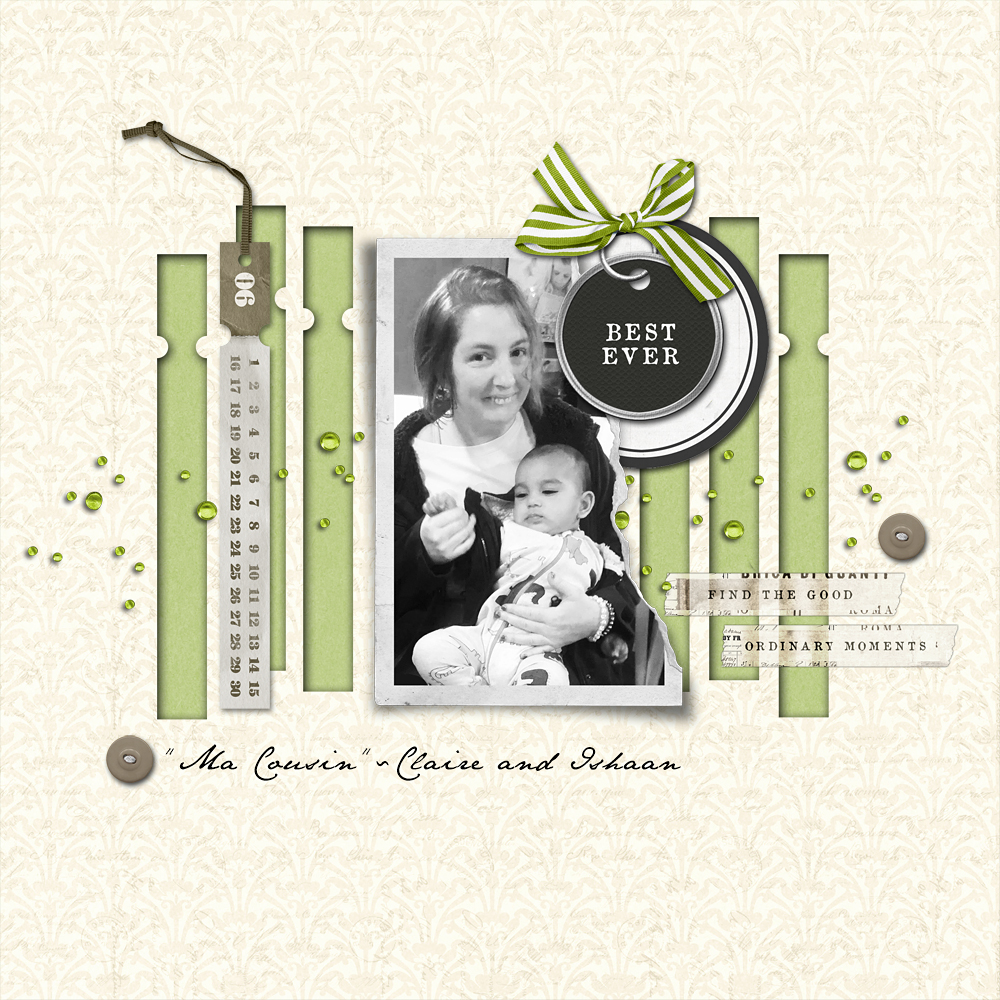
You know how I love to find different ways to use elements and I’ve had a lot of fun playing with these over the last month. For my first example I did use a date tag to date my page but also, along with some staples, to ‘attach’ my photo to the page. It also provides a perfect little spot to tuck a ribbon which forms a visual triangle together with the button and the stacked doilies.
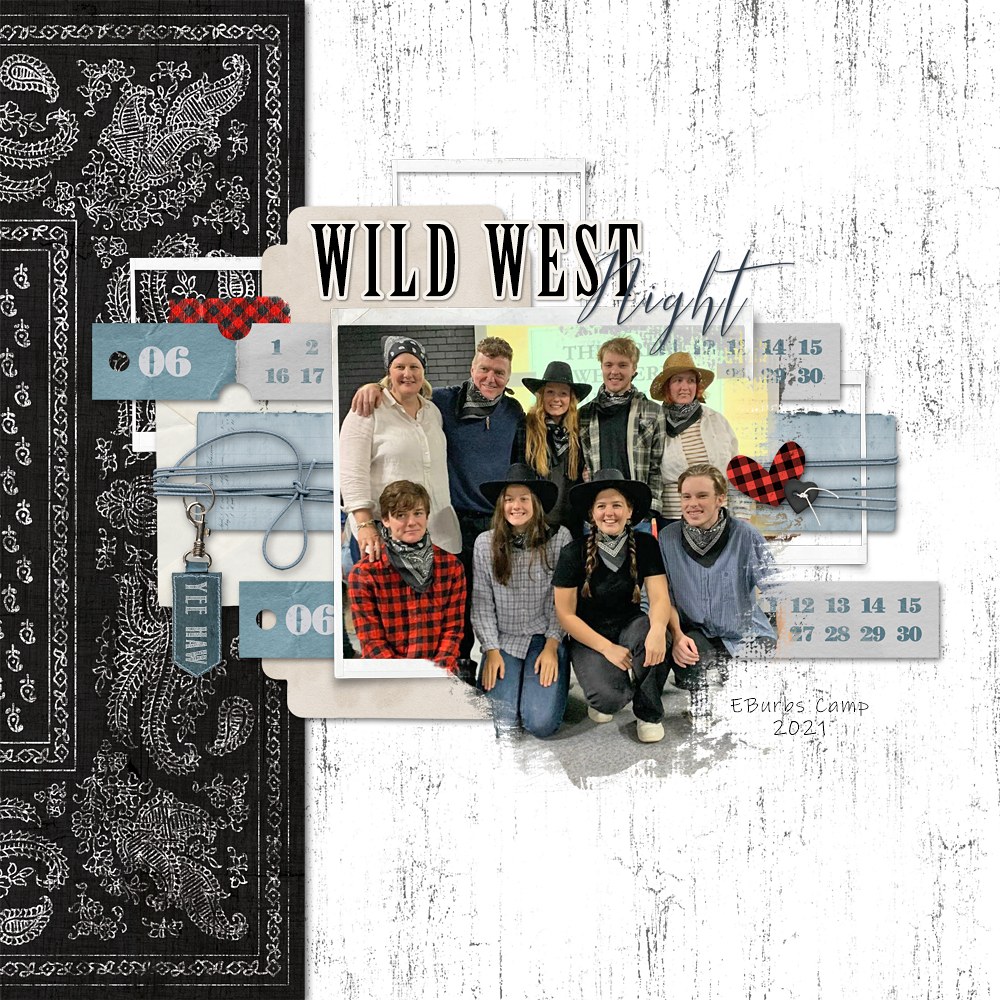
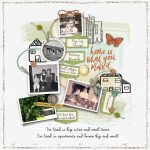
My second layout features Claire with her host family, and here I’ve used the date tags as layering elements. Together with the blue paper strip and elastic wrap, they make a strong horizontal line which contrasts with the vertical strip of bandana paper.
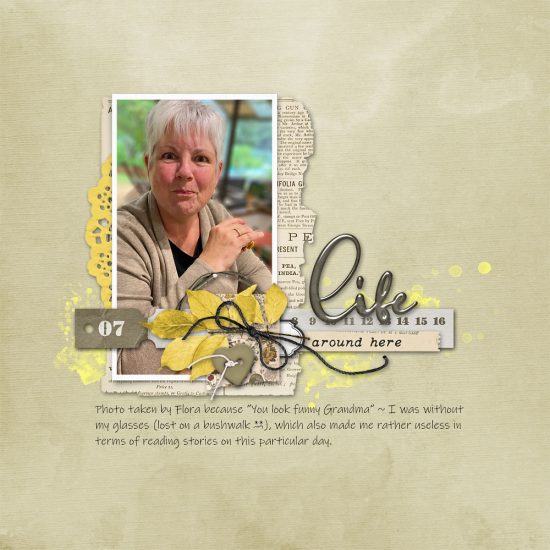
I’ve used a date tag as the basis of a cluster of elements in my third layout. It was quite a surprise to me to find that I’ve become one of those people who look “funny” without their glasses!

I do like to stack an element or two when I get the chance – and these tags are perfect for that. In this layout I stacked five date tags, including one ribboned one. I chose papers to match colours in the photo and clipped them to the other four tags. I love their shape! This provided me with space for journaling and for a title, which I ended up stamping over two of the tags.

Because I loved the shape of the tags so much I decided to have a go at using them to ‘cut out’ parts of the background paper in my last example. To begin with I just duplicated tags and moved them around on my background until I was happy with the look of them. The I merged them together into one layer. Clicked on the layer image to outline them with ‘marching ants’ and then hit the delete button! I then put the solid underneath and added a shadow to the background paper. I added a ribboned date tag, offsetting it against the cutouts, and layered on a few other elements with my photo.
I really enjoyed playing with these elements and I hope you do too! If they’re not already in your stash – there’s the Christmas in July sale coming up very soon 😉 I’ll be popping my layouts in the Get Inspired Gallery along with my credits. I hope to see your layout there too! Don’t forget to add your 100% KPD product pages to the July Challenge Participation Thread to earn a discount code for the store.
Happy Scrapping everyone – stay safe and healthy,
Sharon (Shannamay)

Follow Us