
Let’s Blend Challenge – Fading Frame Layers

Welcome to the first Let’s Blend Challenge of 2022! Fading Frame Layers are so fun and there are many ways to use them. The mask of the frame is basically a gradient, so by clipping another mask to it, we can create a different look. Here’s how to do it:
Clip your photo to the mask layer of the frame. Under that layer, create a new layer and draw out a rectangle the same size of the mask and fill it in with any color. Duplicate your photo, and clip it to the rectangle and merge those two layers together. Then bring in the notebook edge mask below it and clip your merged photo to it. Depending on your photo, you may have to blend out some of the notebook edge so there isn’t a line showing. It should look something like this:
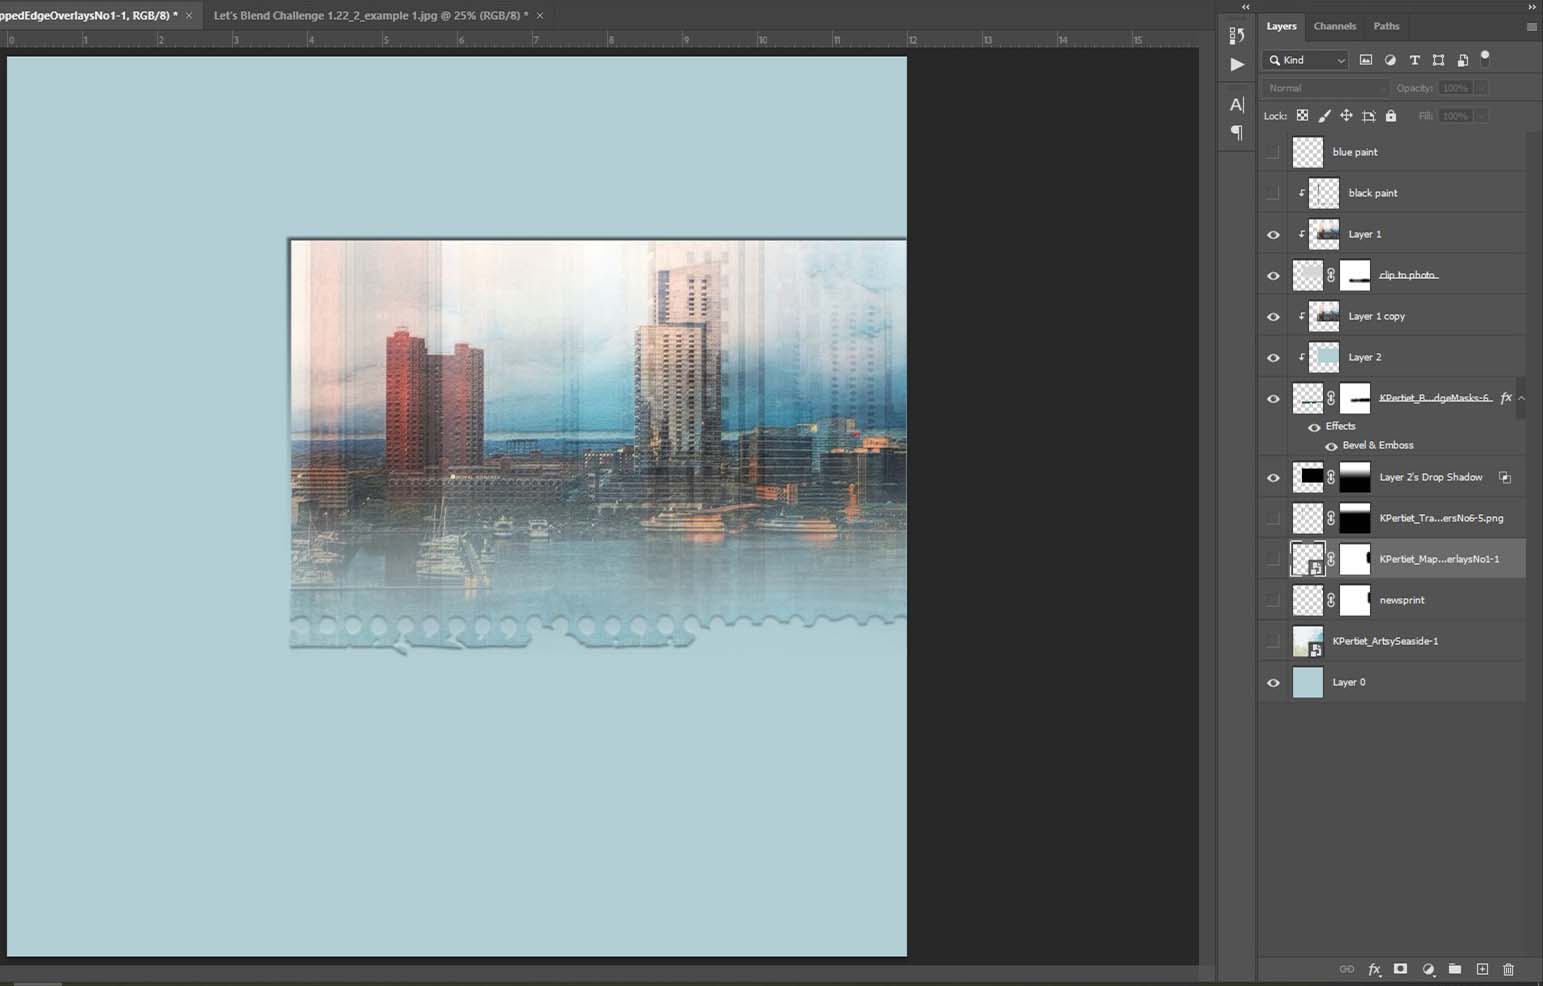
Create a drop shadow and move it to its own layer, by going under the Layer menu, under Layer Style, and choosing Create Layer. Now the drop shadow is no longer attached to the layer—it’s on its own separate layer directly below the original layer. It’s important to have the drop shadow this way so you can blend it out. I used the gradient tool. Now choose your background paper and embellishments to finish up the page.

ALSO…I chose to turn off the frame layer and just use the gradient mask. You can certainly use the frame with this technique, but the drop shadow probably wouldn’t need to be added. You can see by my layers panel, I do a lot of tweaking by adding layer masks and brushing out portions I don’t want on the page.
Katie has generously provided a nice freebie package and I will list the all the products for this page in the Gallery. Please post your pages in the Let’s Blend Challenge Gallery and the January Challenge Participation Thread so you can earn shopping rewards.
Have fun!
Joanne


Follow Us