
Christmas Folio

Hello everyone! Kathy (blackkathy) here back at you for another fun and quick tutorial on how I made this simple Christmas Folio that will be part of my Grand Babies Christmas gift. This will be instead of the Hybrid Journaling Challenge for this month. Four of my grandchildren all prefer cash for Christmas, and I know it isn’t what some of you feel is the proper spirit for the holiday. I do, however, want to keep it a bit more personal and create something from my hands and with my heart to satisfy that need in me. I have done this for the last three years. One year it was an explosion box with photos of them through the years. Another Christmas was little boxes that I created and tags that were created with photos of them. This year, I am doing a folio and the pattern is so quick and simple.

All you will need is 8.5 x 11 inches of cardstock and printed papers. I used the Evergreen Season Printable Papers and Cut Pack and also the digital ephemera kit. I will link all of my supplies at the end of this blog.
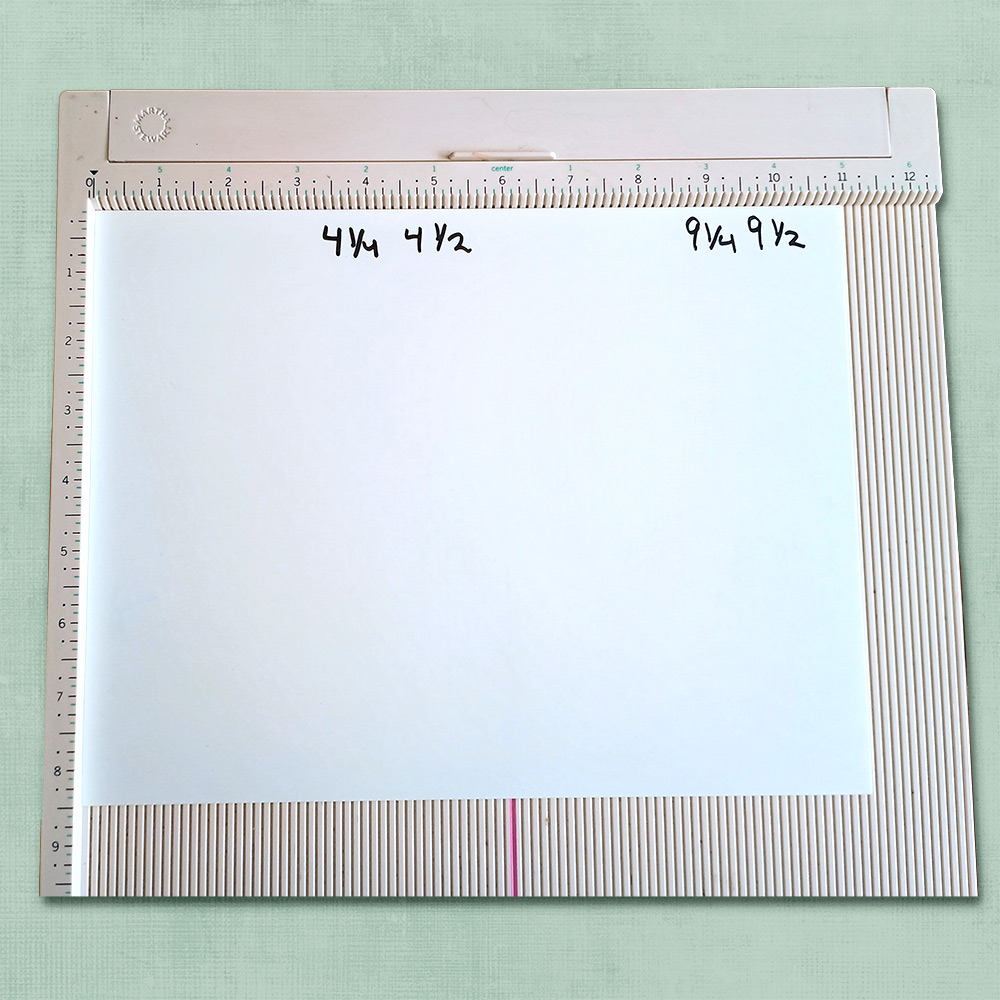
You will start by scoring your cardstock at the long end at 4.25″, 4.5″, 9.25″ and 9.5″. If you do not have a scoreboard, simply mark where your creases should be, both top and bottom and fold. Use a bone folder to create a nice, crisp fold. No bone folder? No problem, just use the handle of a pair of sheers.
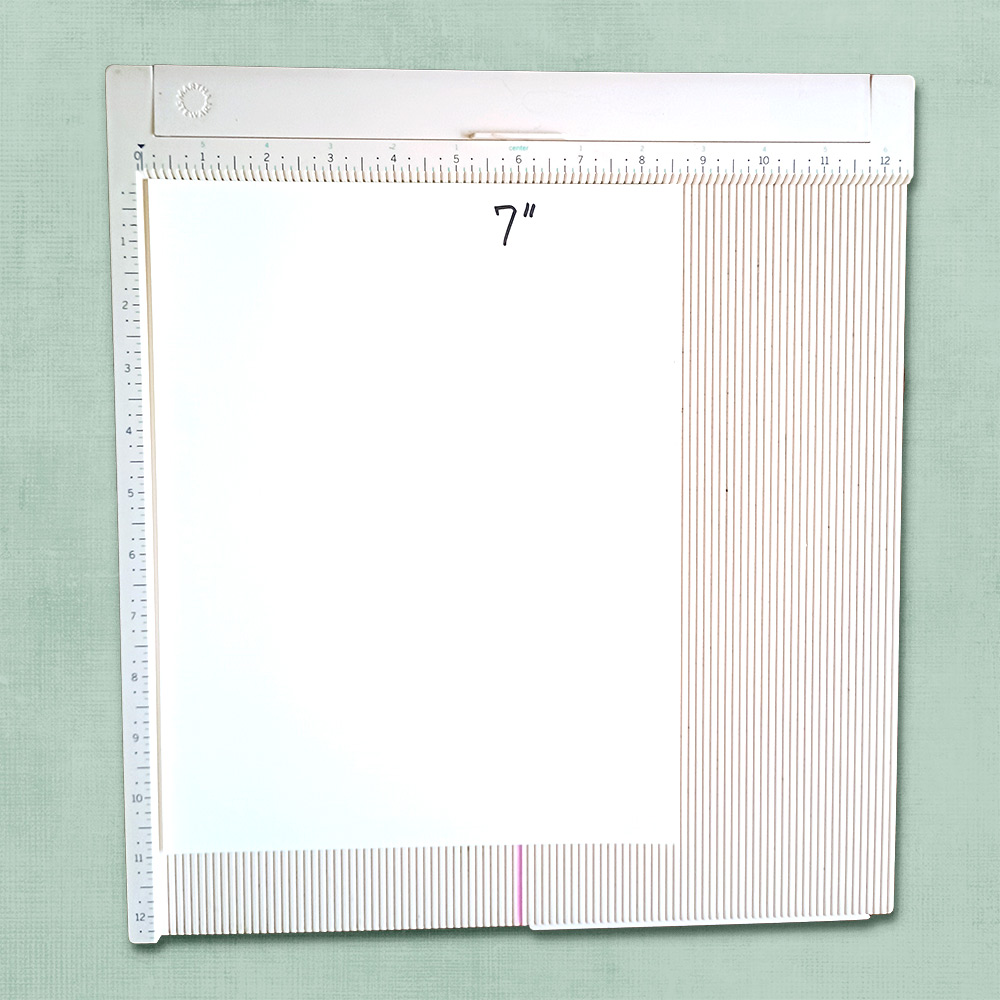
You will then turn your cardstock with the short end at the tops and score it at 7″.
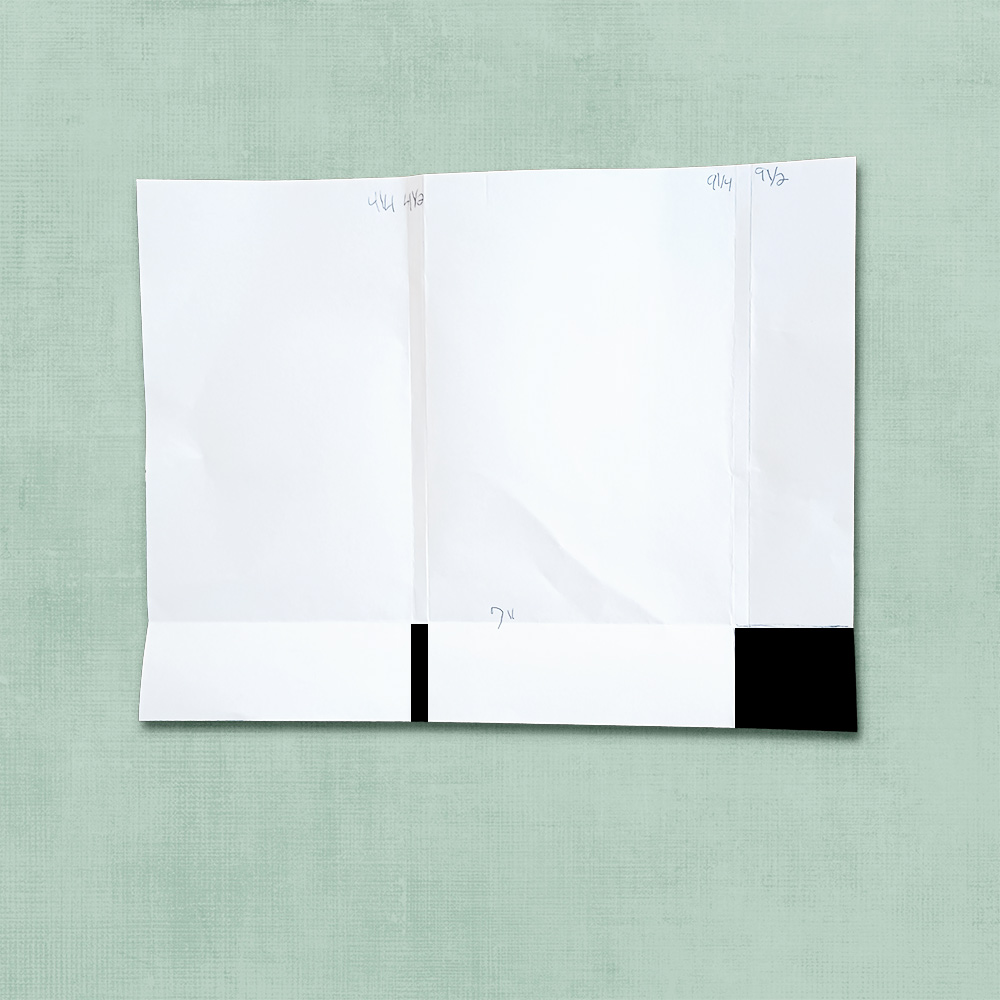
After getting your crisp crease you are going to take your scissors and trim away a couple of pieces, so the folds won’t bulk up. The following diagram shows what you will be trimming out which is what is shaded with black.
Your finished base should now look like this.
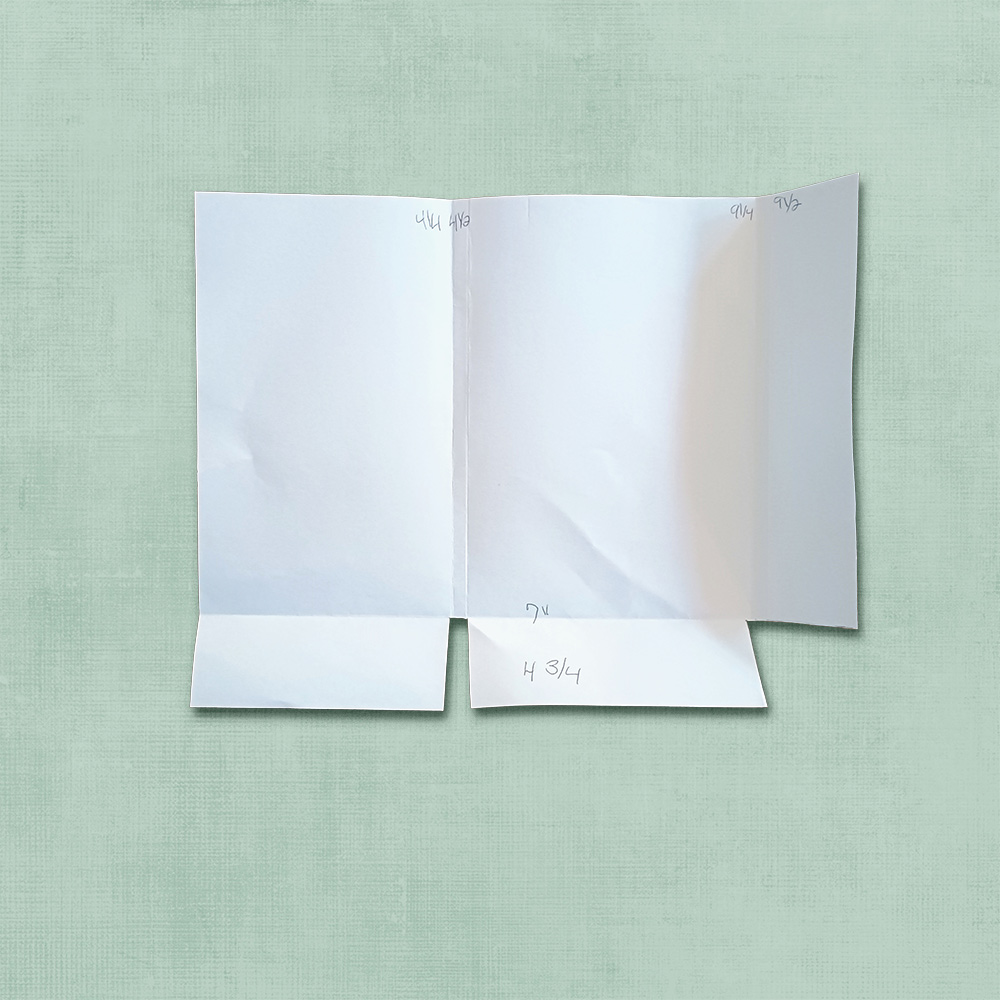
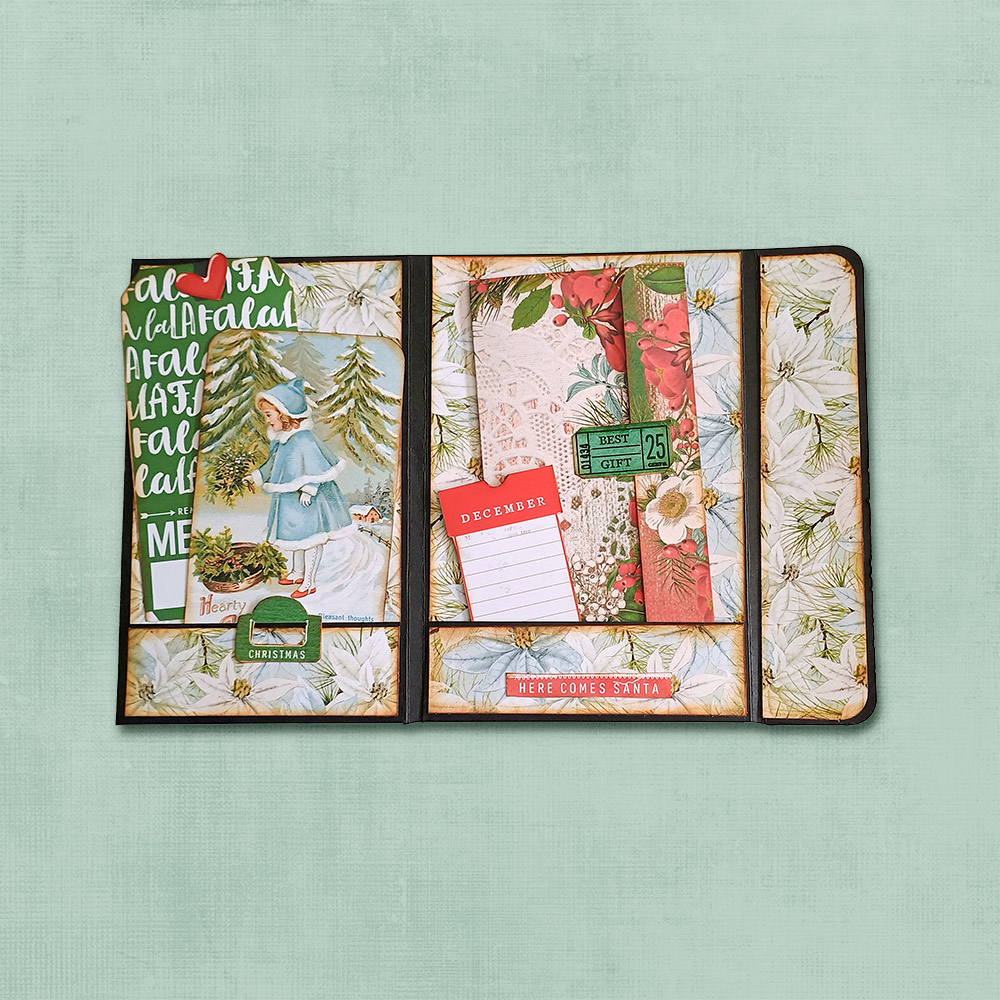
The two bottom pieces with be folded up and glued on either edge to create a pocket that we are going to stuff with some goodies. You should now be here with your folio. You will want to add your papers to the inside of your folio prior to gluing the sides of the pockets. It will be so much easier than doing it after.

You may create your base out of any coordinating cardstock and papers you so desire. I used black for mine. You will now measure each part of your folio to add your decorative papers to. You may leave any size border around that you desire or you may choose to leave none. I inked around my papers before gluing them on. I did add a magnet to the front of the folio between the paper and the base and then to the closure on the right, also between the paper and the base so it satisfyingly snaps shut.
This is the front of the completed folio.
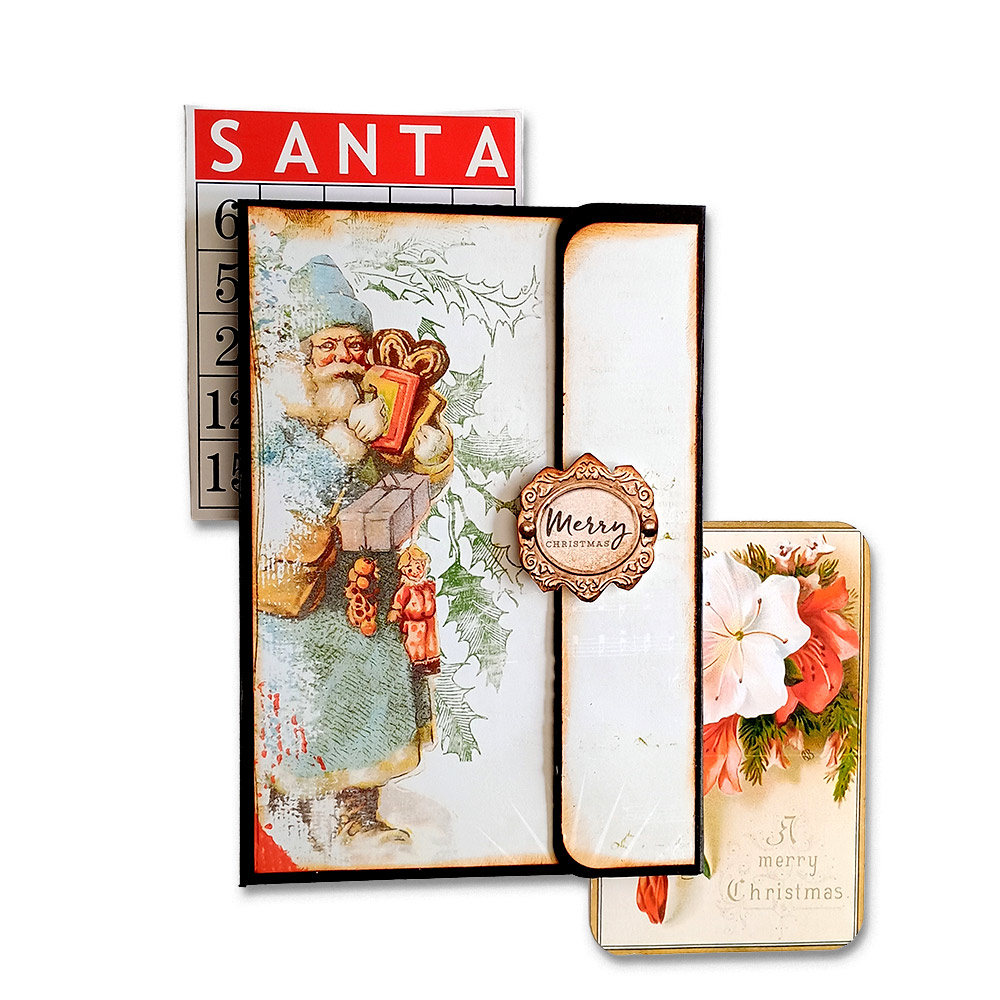
This is the finished inside. I made a money envelope by simply folding some paper and adding a tag for a closure. I printed off some ephemera pieces and and some items from the print and cut packs. I just fussy cut around them.
Supplies used on folio’s Evergreen Season Printable Paper 01, Evergreen Season Printable Paper 03 , Evergreen Season Print and Cut 02 , Evergreen Season Ephemera , Light Strings 04 (for layout), Evergreen Season Solids
This takes the place of the the Journal Challenge, so if you do decide to join in and create a festive folio, then please, upload a photo to the Journal Challenge and then upload to the October Challenge Participation forum to receive credit. I would be so excited to see what you can create and thank you for your patience with my less-than-ideal rustic instructional photos!


Follow Us