
Challenge of the Month – In a Mood
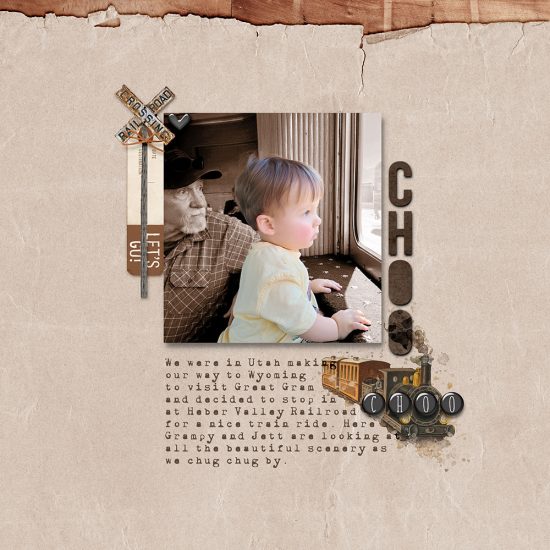
Hello fellow scrappers! Kathy (blackkathy) here for another epic, easy and seriously fun challenge of the month. This month, I thought I would inspire you to change up those photos into something more melodramatic, whether it be light and airy or moody and dark with keeping the focal point untouched. I will show you how using a simple gradient map and making small tweaks on your photos until you are thrilled with the results. This is the final result on my Train layout with the ever-delightful honey and the honestly adorable grandson, Jett.
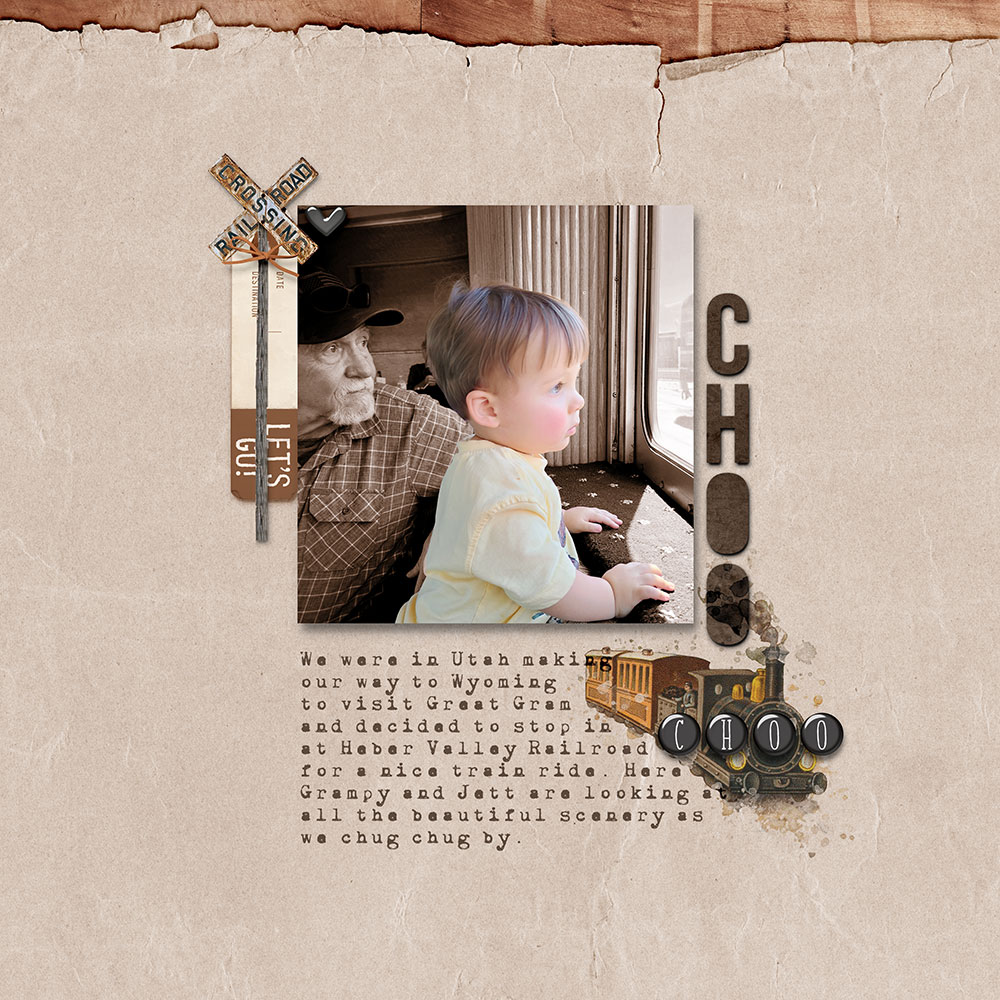
Supplies used: Vintage Artistry Wherever Ephemera, Vintage Artistry Wherever Ride Transfers 1, Vintage Artistry Wherever Wishing Bubbles, Vintage Artistry Wherever Solids, Everlasting Remix Alpha Black, Blacked Out Alpha, Curated Team Favorites Life with Cats Papers – Coming Soon
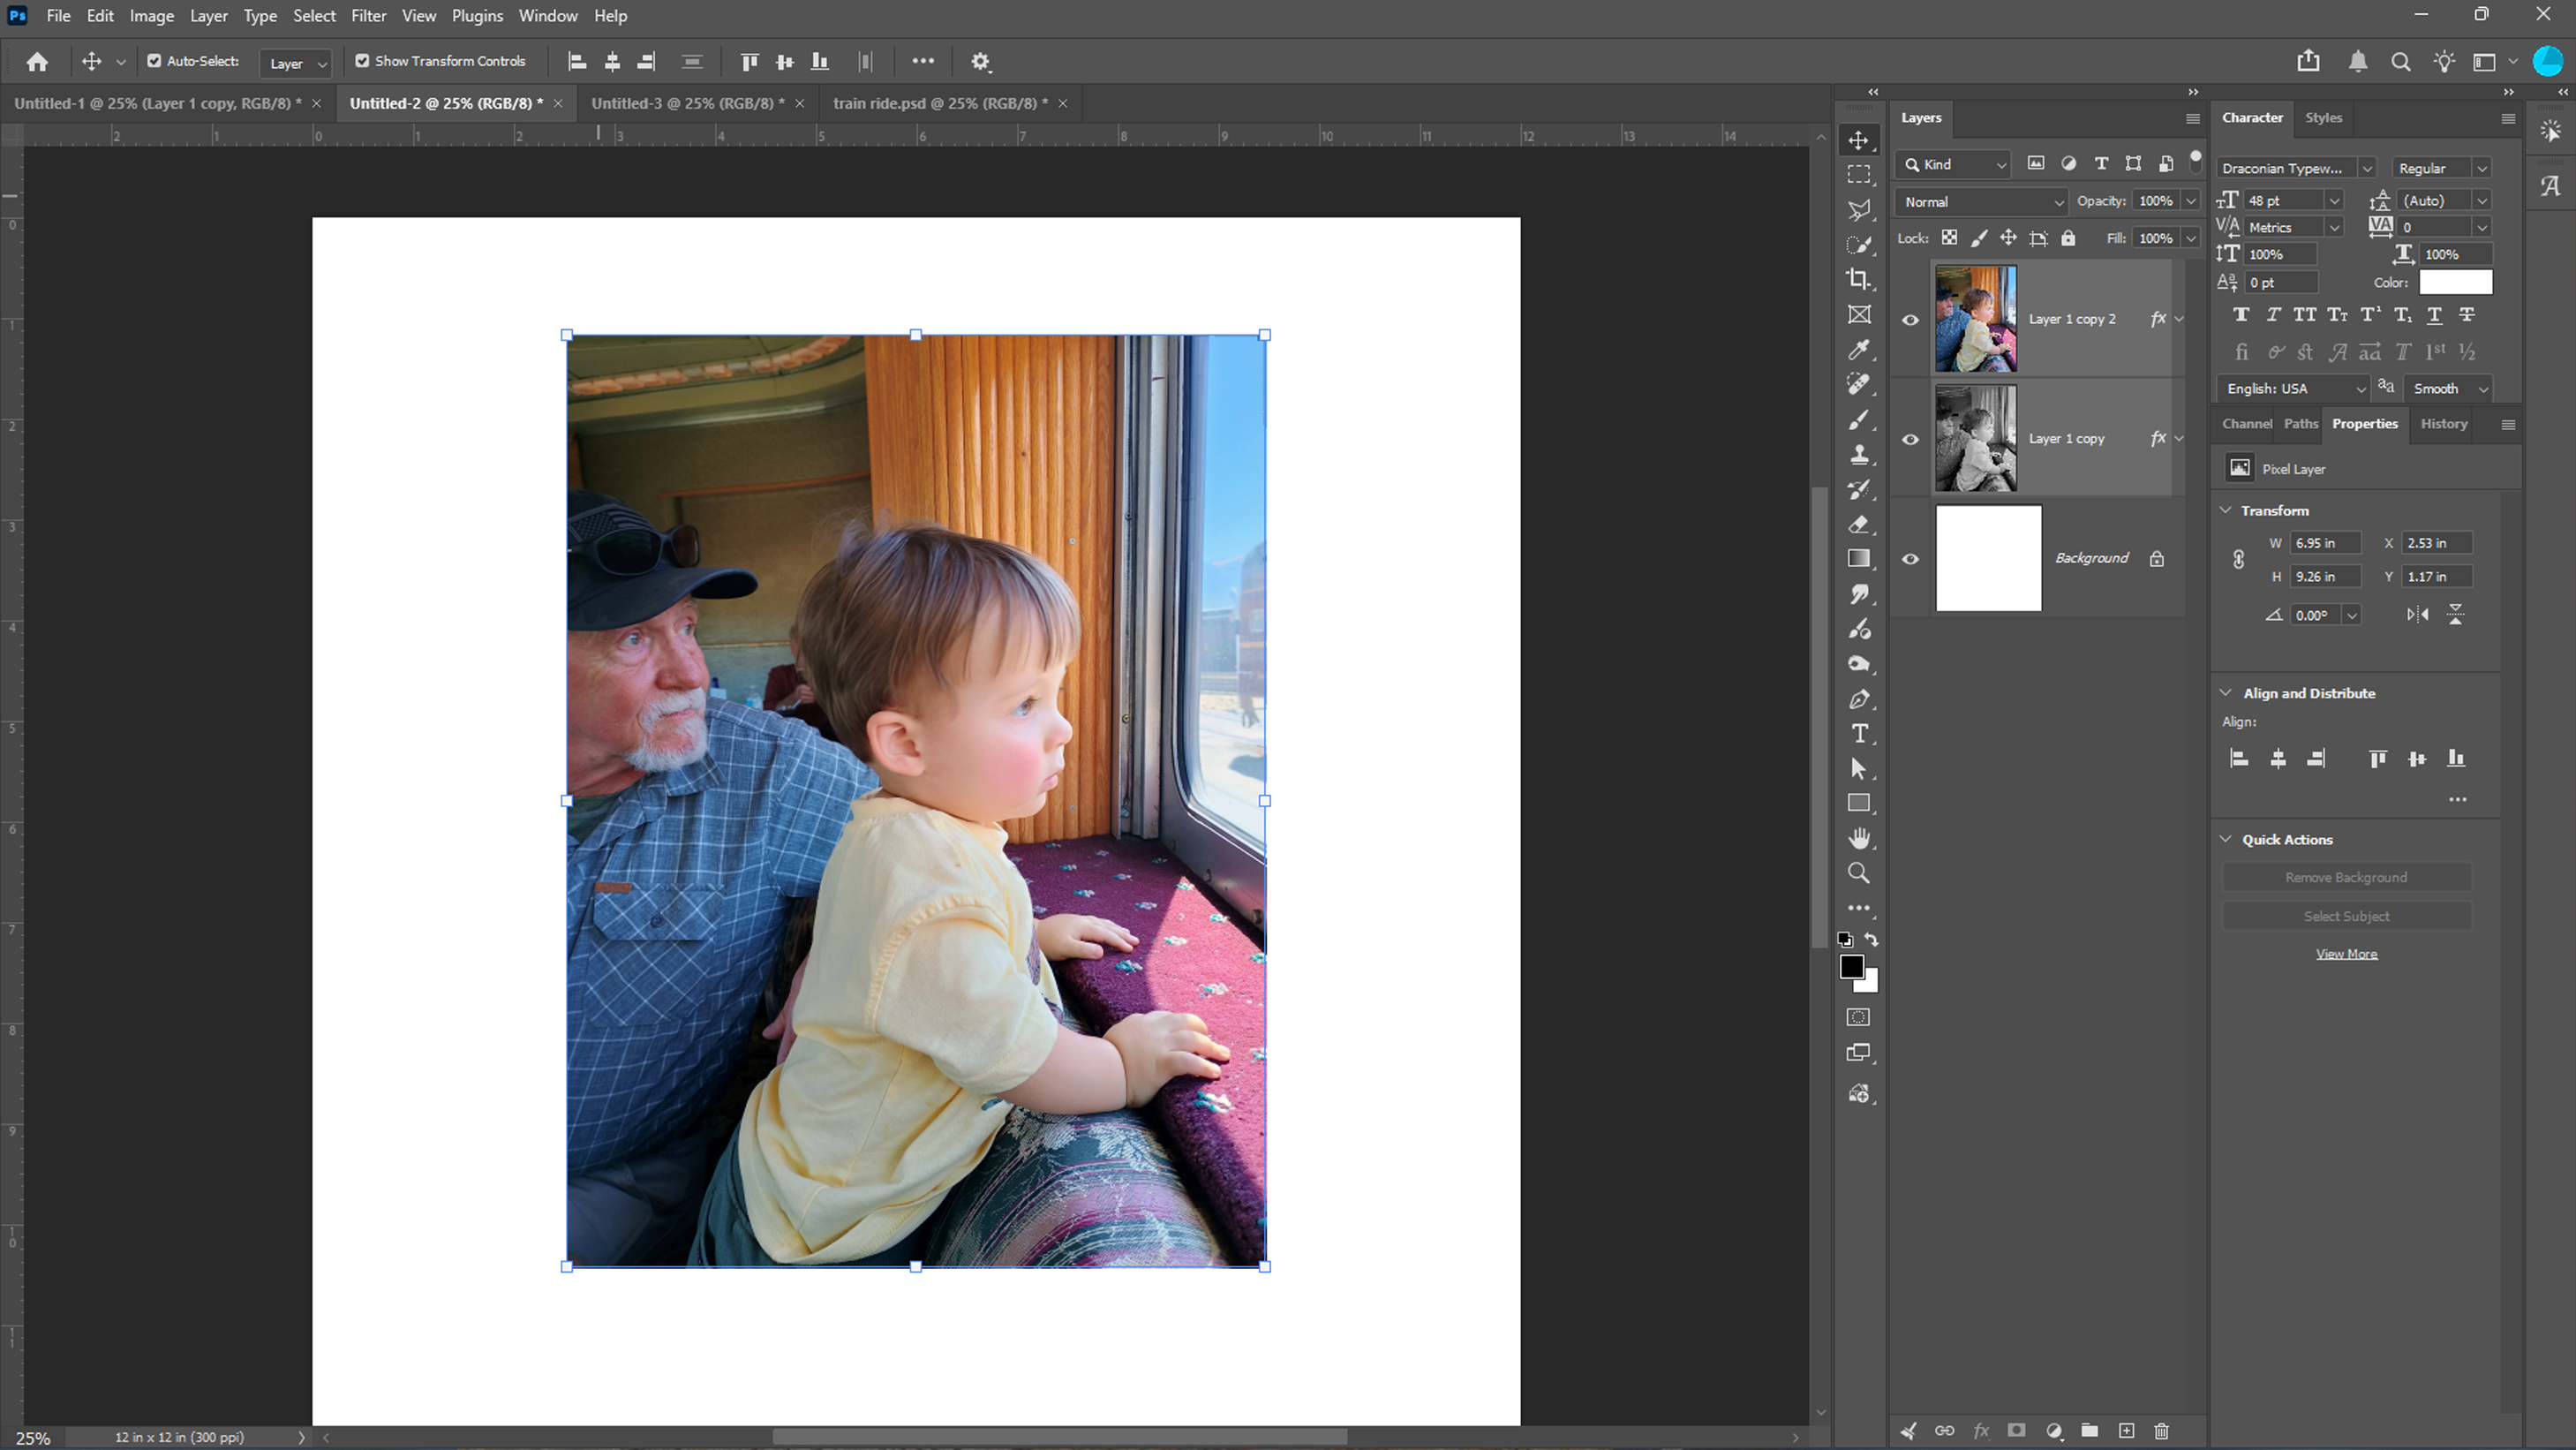
First up, add your photo onto your workspace. Duplicate your photo and turn off the top photo. With the bottom photo selected, turn it into black and white by using the shortcut Ctr + shift + U. You may tweak it here if you like by using levels. Sometimes the photo needs a little bit more light to it.
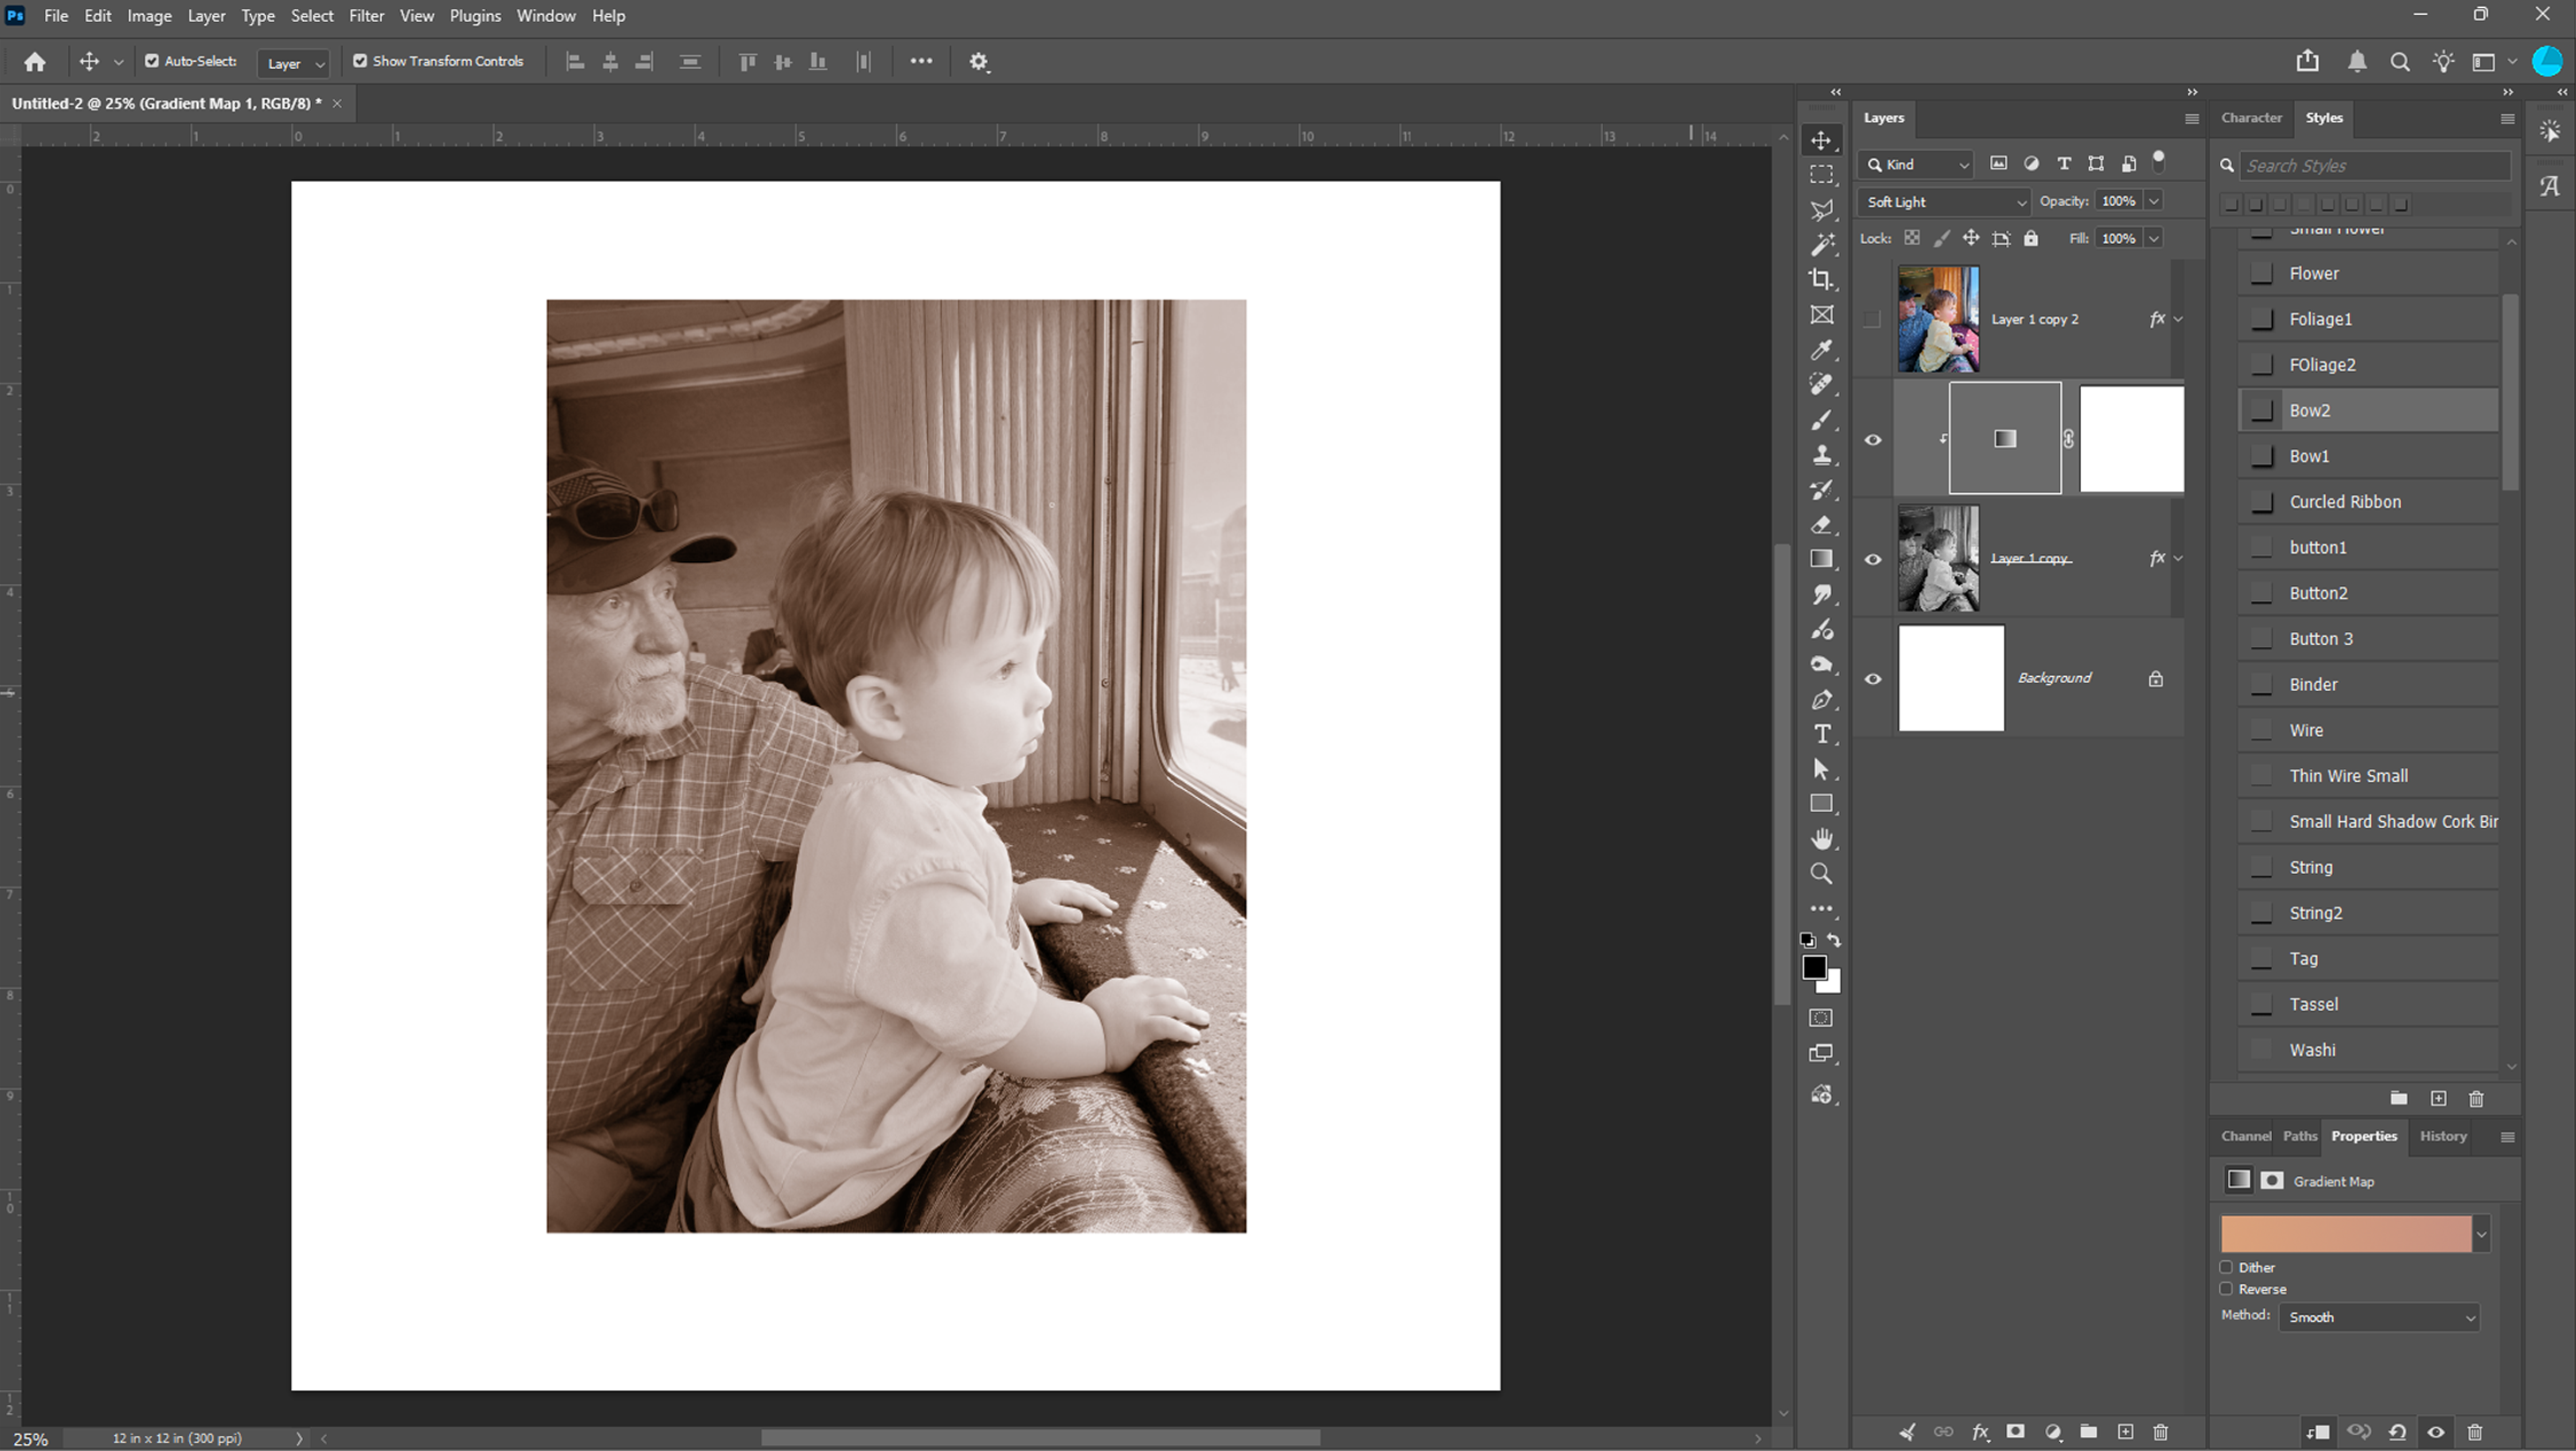
Here you will want to add your gradient map. With the black and white photo selected, click on the icon in the adjustment panel that contains the gradient map. Click into the properties of the gradient map and it will give you options for changing the colors of the gradient. I simply chose a neutral color. Clip the gradient to your photo and change the blend mode to whatever is to your liking. I chose soft light. Again, you can tweak it to however you like by using the different adjustment tools.
Make sure your photos are perfectly aligned. In photoshop, I am able to use one of the selection tools, (typically I use the magic wand) to select the subject of my photo. Once selected you will notice up on the toolbar that you have options and one of them is select subject. You may also go up in the top bar and click on select and then subject. Click on that and your subject should be surrounded by the “marching ants” almost perfectly. Click on the mask icon. I believe you have this option in PSE as well. If you are using a different program, then you will have to use the tools necessary to reach this stage. Merge all the layers when you are satisfied with your photo.
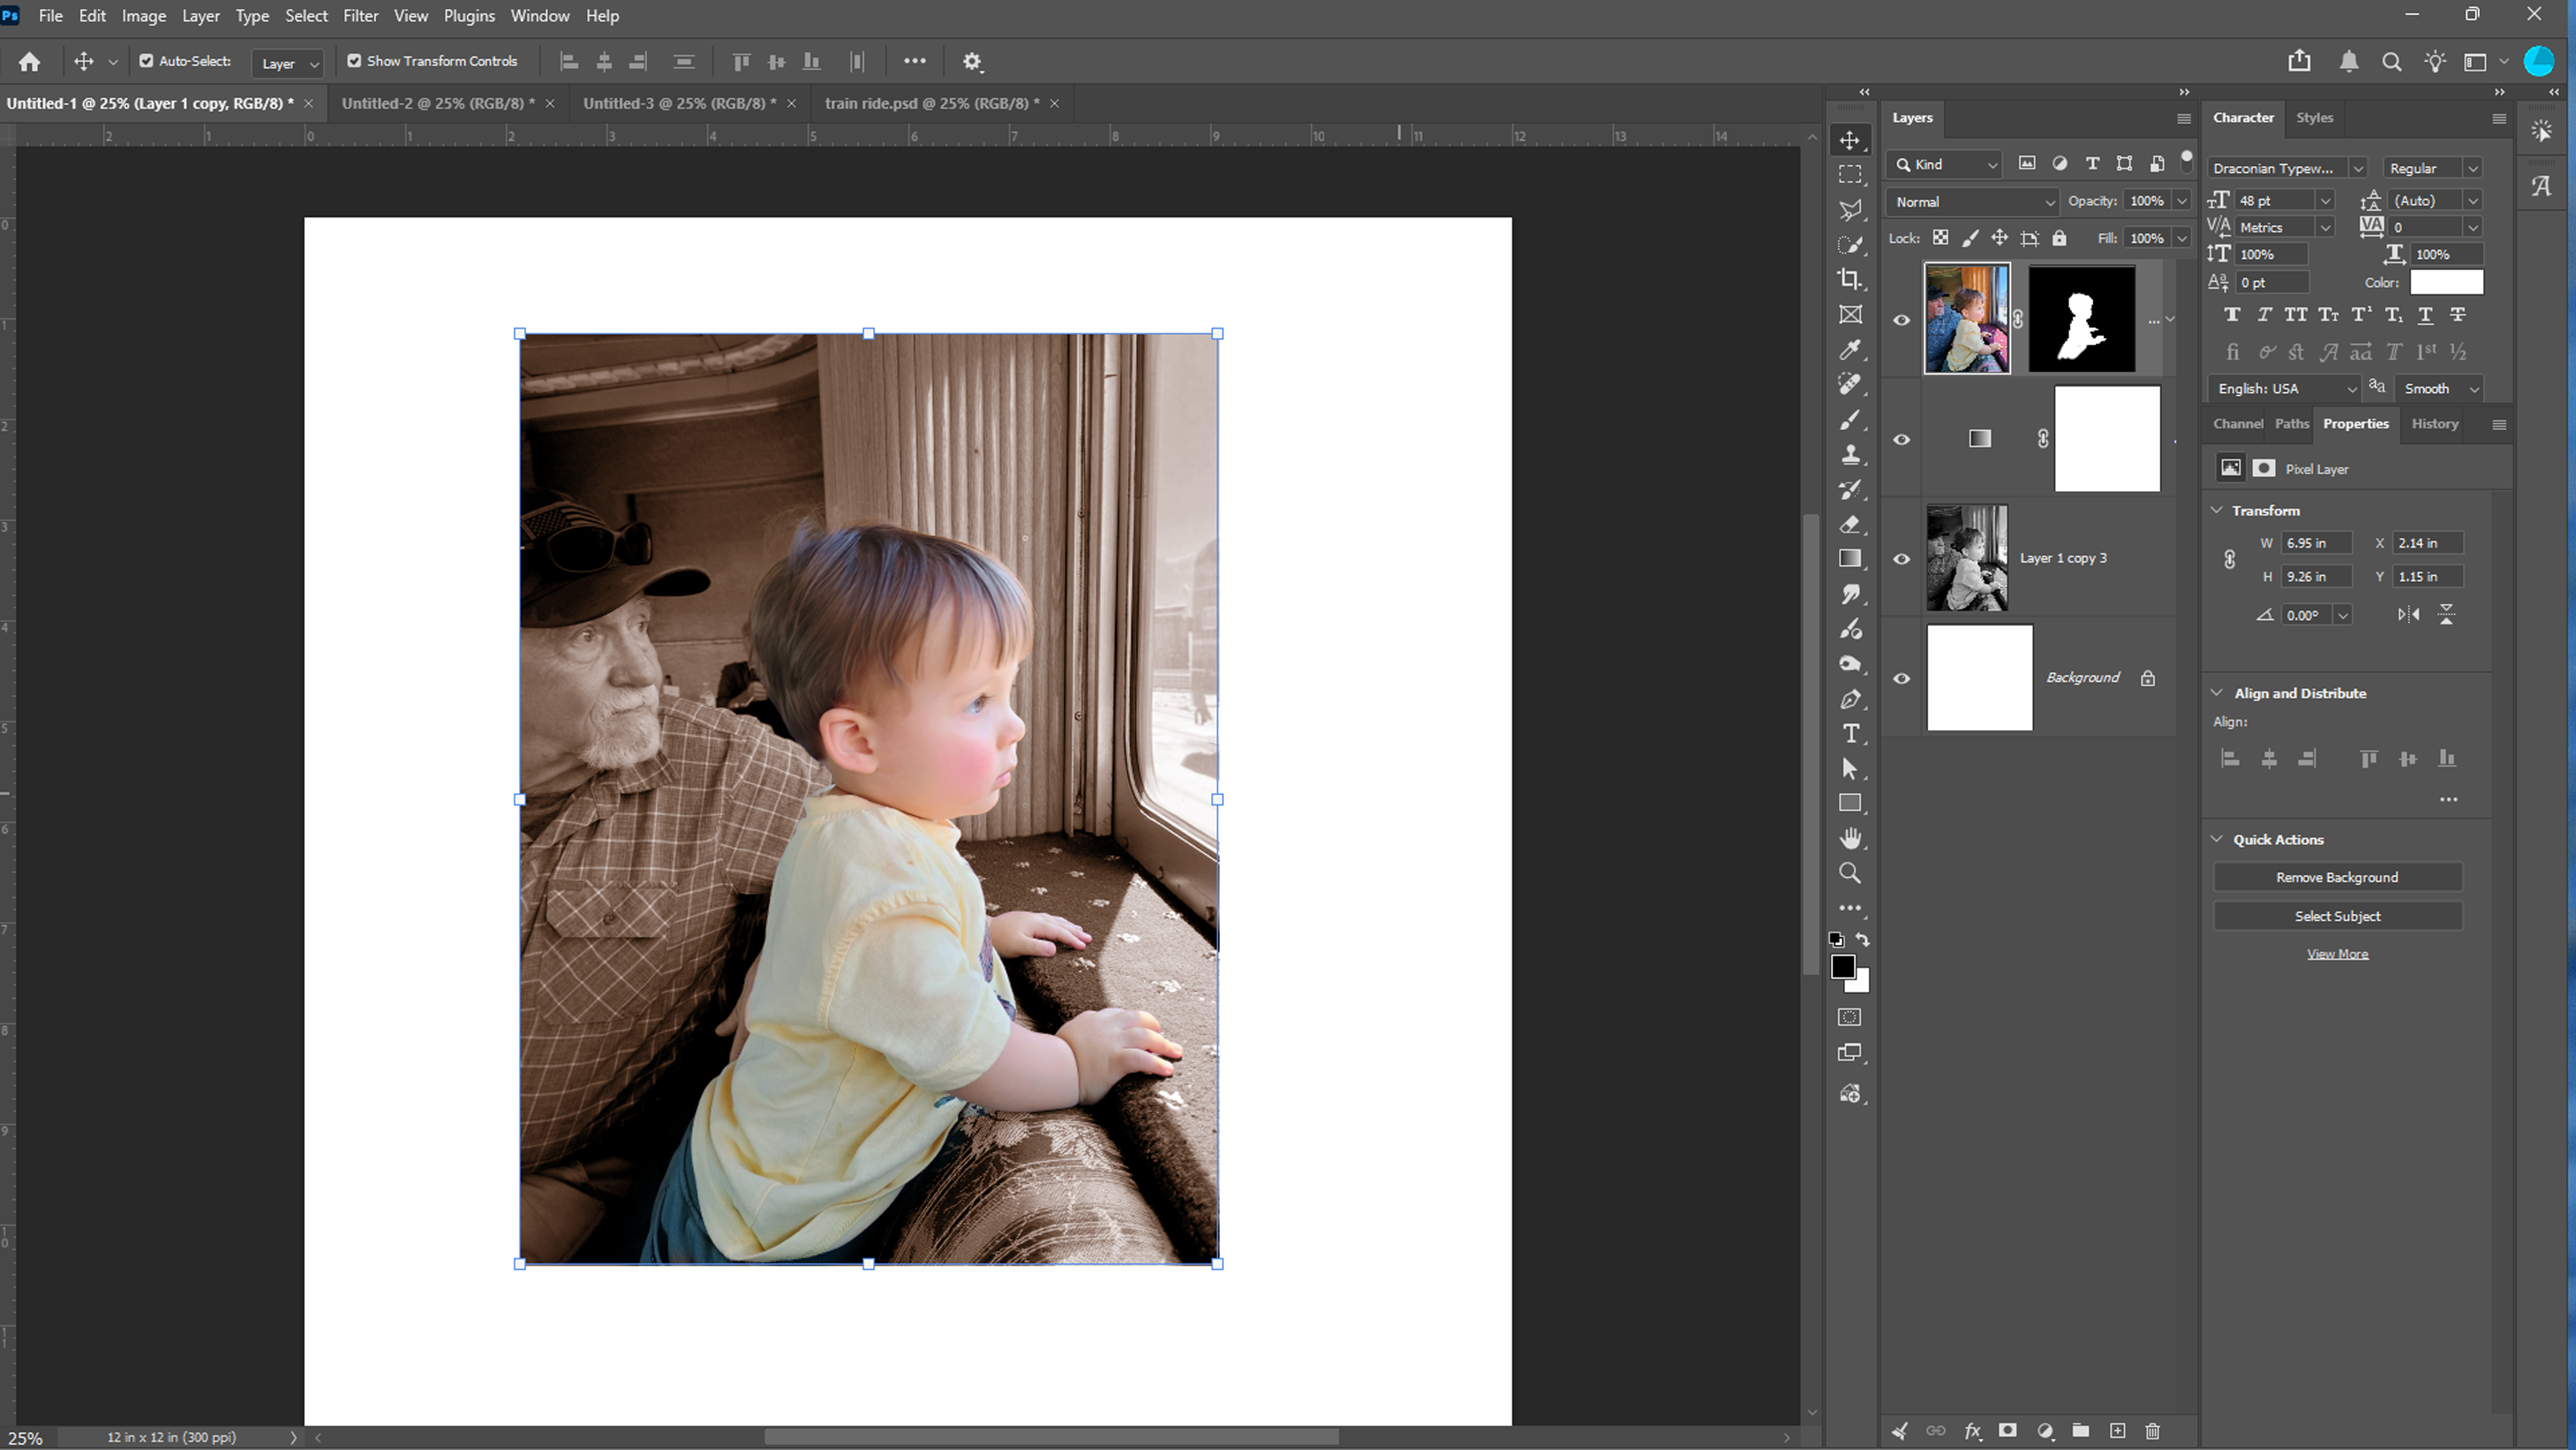
Crop your photo to the size that you want, and you are good to go!
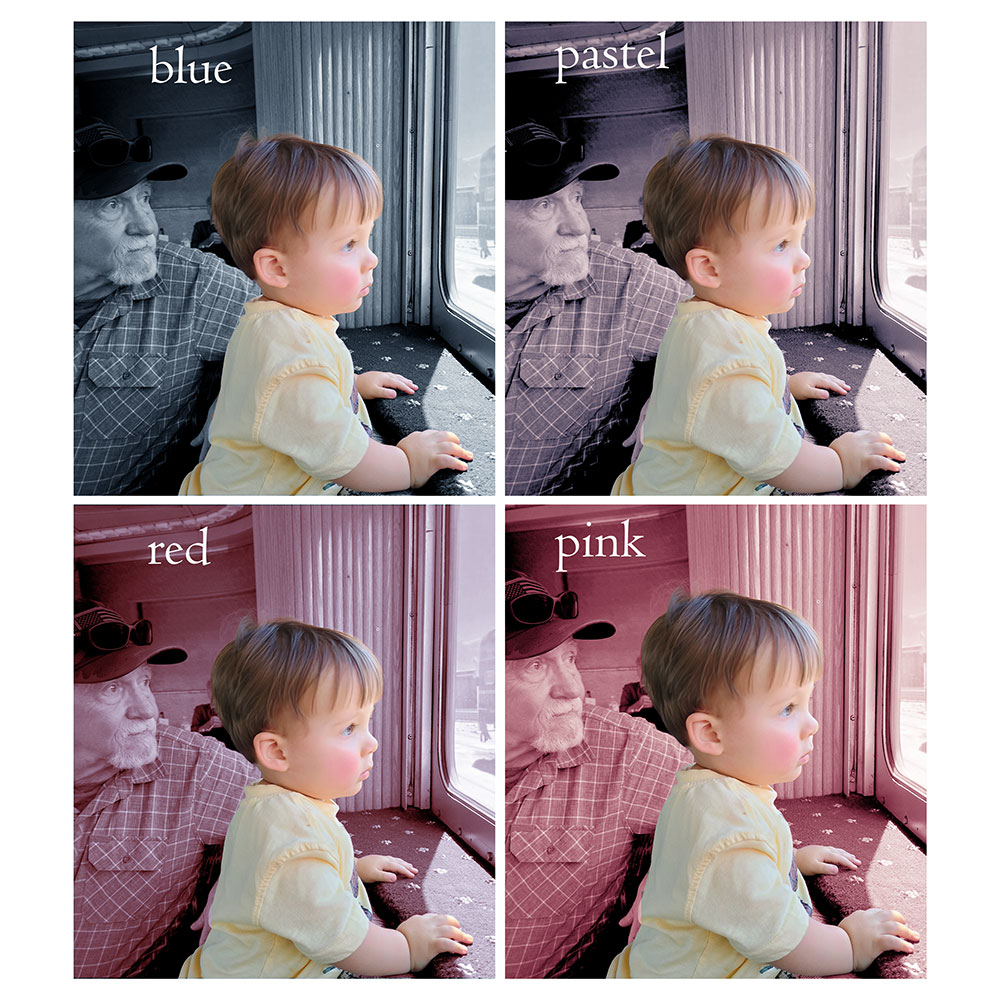
I have created four different looks with the same photo using different colored gradients with each gradient clearly identified.
I hope you will give this a try and if you have any questions, please do not hesitate to reach out to me on Katie Pertiet. Remember, go crazy and just have fun with it! Remember to upload your gorgeousness in the Challenge of the Month Gallery and in the July Challenge Participation forum for the credit towards a coupon from the shop. I can’t wait to see all that you scrappers come up with!
Follow Us