
Let’s Blend Challenge
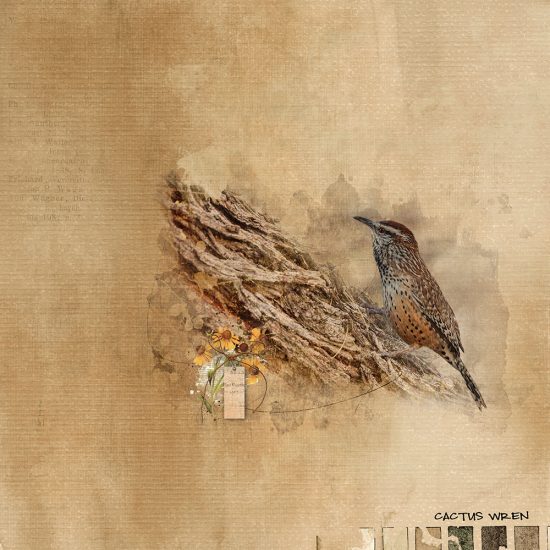
Hello Everyone! Joanne (jcaruth910) here with this month’s Let’s Blend Challenge. Blending two masks together can create some very interesting images, so I thought we might try it out. This is my page, and I’ve gone through my thought process below.
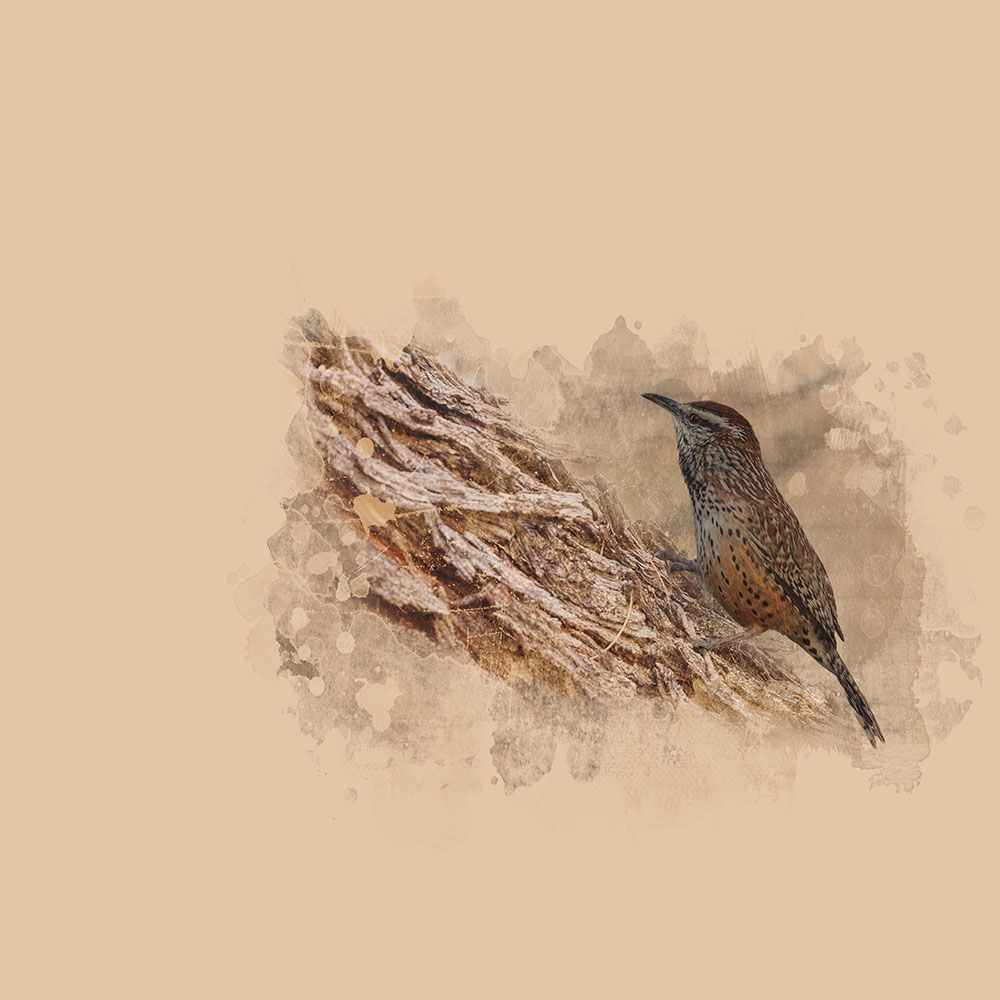
Bring both masks on to your background layer, add your photo and duplicate it. Clip each photo to one of the masks and turn off the top clipped layers. Change the opacity of the mask to 50%. Turn on the top two layers and change the opacity of the mask to 60%. It will look something like this:

Now is when the fun part begins. I wanted to add more depth, so I duplicated the photo again, and extracted the bird but did not clip it to the top mask. Change the blend mode to multiply and reduce the opacity by at least 50%. Duplicate the bottom photo, add an inverted mask to it and brush in what part you want to show, and reduce the opacity and fill to 90%. You then can add your background paper(s) and also clip different textured papers to the layers to soften the colors. Adding adjustment layers also can enhance the finished image. I almost always add a Levels adjustment layer to the top of my finished jpeg image. Just that step can make a huge difference if you think your layout looks flat or doesn’t look as sharp as you would like.
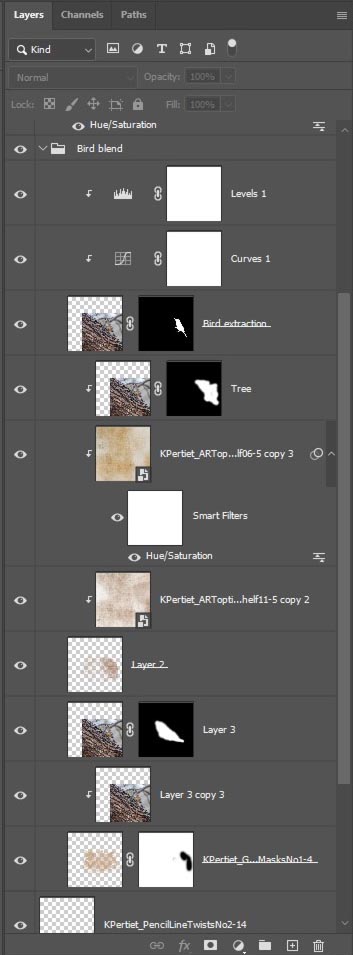
Here is a shot of the layers panel of just the bird portion of the layout.
This is just one way you can use these masks. Feel free to use your creativity by using them any way you would like. Katie has once again provided a generous freebie for us to use as inspiration. As always, please don’t forget to post your layouts in the Let’s Blend Challenge Gallery, as well as the March 2026 Challenge Participation Thread to earn store rewards.
Happy Blending!
Joanne
Follow Us